Bubble Letter J – How to Draw Your Bubble Letter J
J is the 10th in order and one of the most accessible letters to figure out how to compose. Whether it’s the capitalized or lowercase rendition of the letter, you’re making a bent line that seems like a fishhook. Composing the letter is quite simple to learn, yet I have yet to arrive to make a standard rendition of it. Letter! We will tell you the best way to make an air pocket letter J. We’ll do this by directing you through 6 tomfoolery and simple tasks that will tell you the best way to draw it and add subtleties to make it far superior. However, there will likewise be a segment toward the end investigating a few fun thoughts you can attempt to make it considerably more extraordinary.
Stage 1:
Instructions to draw your air pocket J stage 1
As we referenced in the presentation, the letter J is a basic, bent fishhook shape. Sometimes, a capital J might have a line at the top. However, we will not have that in this plan. Given this, we will initial segment of this letter. Before you begin defining boundaries, we suggest arranging them with a pencil. You can draw a substantial ordinary J shape around which you will build the air pocket variant. You don’t need to do this, yet it sure can help! For this step, we will draw a bent, adjusted line for the lower left piece of the letter. Whenever you have drawn this part of the letter to match our reference picture, we can continue toward stage 2.
Stage 2 :
Instructions to draw your air pocket J stage 2
We’ll keep things extremely straightforward in this second step of the aide. In this part, we will broaden the line you began in the past step. We drew the little “tail” part of the J in the previous step, and in this one, we’ll draw the foundation of the letter. Keep the line where it finished in the past step, and keep up with the bend. As you can find in the reference picture, this line begins to bend. We’ll make the principal mainstay of the J where this line closes. However, that will come in the following steps. Until further notice, attempt to match the attraction to our model admirably well. We can then continue toward stage 3, where we will build this letter.
Stage 3:
The most effective method to draw your air pocket J stage 3
In this third step of the aide, we will start to draw the focal mainstay of the air pocket letter J. This will be finished by adding a marginally bent vertical line. As you can see from the reference picture, this line will stretch out from where the line in Sync 2 finished. When you define this boundary, you should maintain that it should be straight yet not excessively straight. We don’t need excessively straight lines since the letter should seem like an air pocket. When you draw this side of the point of support, there will be a genuinely substantial void space on the left. The subsequent stage will see you complete the layout before adding a few inside subtleties.
Stage 4:
Instructions to draw your air pocket J stage 4
As we referenced in sync 3, the aide’s fourth step will be to finish the diagram of this letter J. To do this, we will utilize a bent, wavy line to fill in the hole on the left half of the letter. It will begin where the line from the past step finishes at the highest point of the J. It will go down and afterward bend pointedly to finish the tail of the J. When this line is drawn, the layout of the letter is finished. !You will be prepared to draw a few inside subtleties, yet ensure you are prepared before continuing toward stage five. One method is to delete all the pencil lines you used to set up the drawing. Toward the start, we were advised how to draw a regular letter J with a pencil.
Stage 5:
The most effective method to draw your air pocket J stage 5
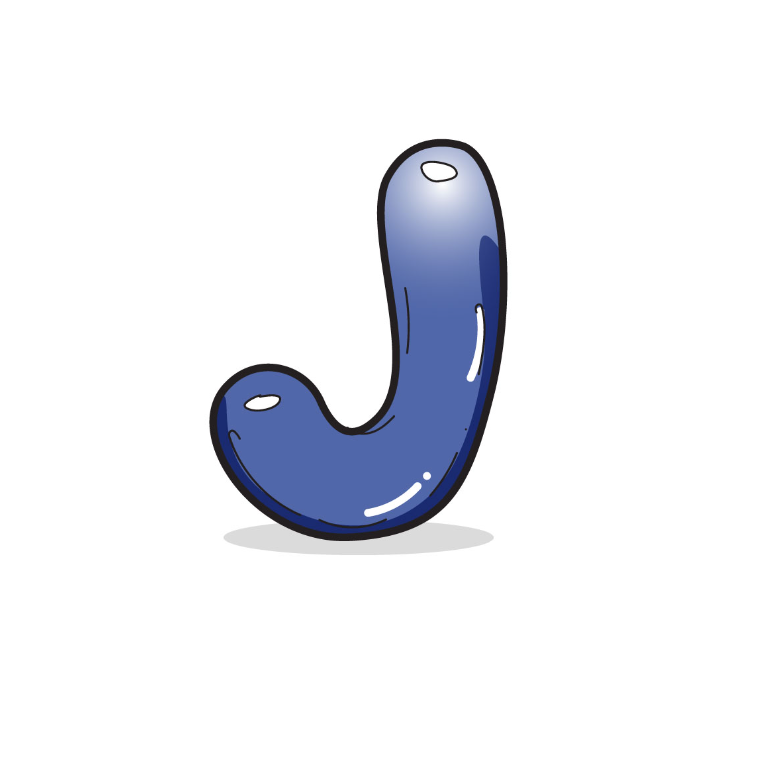
The fundamental objective of this guide was to take the letter J and make it seem like it’s made of an air pocket or inflatable. We will assist you with finishing this impact with a couple of straightforward subtleties. To begin with, we’ll give the letter an intelligent look by drawing a few straightforward oval shapes on the letter. As you can find in the reference picture, we will utilize two oval shapes. There will be one at the highest point of the J and one toward the tail’s finish on the left half of the letter. You can likewise add a few intelligent focuses.
also read: Bubble Letter J – How to Draw Your Bubble Letter J